OUTEX CLEAR
TUBELESS KIT
Supplementary Instructions for
Masking Tape
★Affix masking tape to both edges of the rim
depression, making it easier to affix double sided tape.
Please proceed to 1, after completing the preprocessing
before affixing the double sided tape.
(Refer to the instructions included with the
product)
|
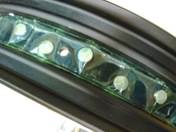
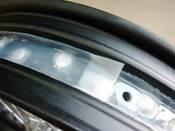
1. Cut off about 5mm of double
sided tape and affix it in the center of the rim depression. Use a magic
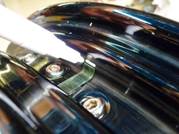
marker to mark both edges of the double sided tape. |
2. Using the magic marker marks
as a guide, affix masking tape all the way around. |
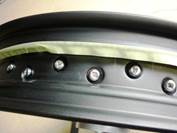
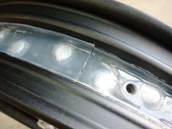
3. After affixing it completely straight all the way around, go foward
pressing it down to match the height of the magic marker marks. |
4. Masking complete. |
|
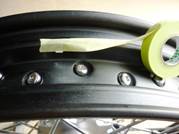
5. While sliding both edges of
the double sided tape, and ensuring that it doesn't become uncentered, go
forward affixing it to the nipple surfaces. After affixing it all the way
around, cut it off from the roll using scissors. |
6. Affix it while pressing out
the air between the double sided tape and rim. Next, use a utility knife with
a fine tip to cut a hole for the valve. |
7. Peel off the green release
film. |
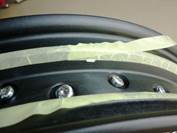
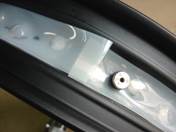
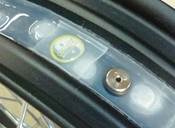
8. Put the valve through the
hole in the protective sheet, and affix the protective sheet. Ensure that the
protective sheet doesn't become uncentered from the rim center, and at this
point it is okay to affix it lightly as in the image. After affixing it all the way
around, cut the protective sheet once. |
|
9. First, press down the center of protective
sheet all the way around. |
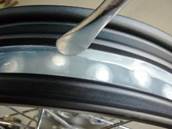
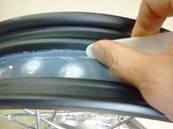
10. Avoiding
damage to the protective sheet, push out the air from the protective sheet on the
circumference using a tire lever with a round tip, etc. |
11. Press out the air. |
12. Please cut the protective sheet with a
utility knife avoiding overlapping It is okay if there is a slight gap. |
|
13. Firmly press down both edges using a
plastic spatula, etc. |
14.
Affix the double sided tape, hologram sticker, and
protective sheet onto the seam in that order. |
For the rest, refer to the instructions
included with the product. |
|